
Resolving to free up space: My ceiling lift project
Determined to free up the space in my room currently occupied by a floor lift, I started researching ceiling lifts—and testing myself to see if I could actually bring this project to completion.
Both floor (mobile) and ceiling lifts have their advantages. The strength of a mobile floor lift, as the name suggests, is its mobility. If it’s foldable, even better—it’s convenient for transport and travel.
I wouldn’t exactly call it a drawback, but if you live in a small apartment, the floor lift can take up valuable space. If the space is larger, it’s less of an issue—it can be tucked out of the way.
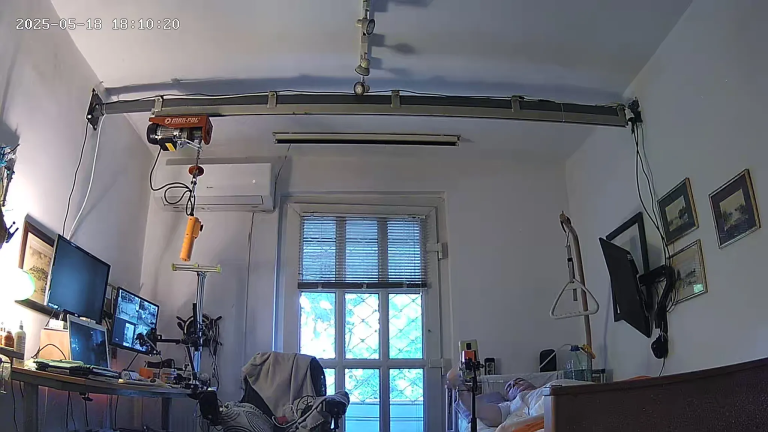
Floor lifts also require plenty of manoeuvring room to perform a transfer from bed to wheelchair. In contrast, the ceiling lift has one huge advantage: it doesn’t occupy any floor space at all. A metal rail is installed close to the ceiling, supported by wall brackets, and the lift unit slides along the rail.
There are many companies abroad that offer ceiling lifts for home use. However, these systems often come with four-figure price tags, and any reasonable person might ask: what exactly makes that metal setup so expensive?
My Floor Lift Experience
My current floor lift does the job—it’s foldable and travel-friendly.
But.
The floor in my room isn’t perfectly leveled—there’s a slight incline, and it’s becoming increasingly hard for my mother to transfer me from the bed to the wheelchair and back. It takes a lot of strength to manoeuvre the lift, especially with uneven flooring.
When the surface is perfectly smooth and flat, floor lifts work just fine. But if you have carpet, you’ll likely need to remove it, as lifts roll best on smooth surfaces.
Another important factor is the wheels. Some lifts come with basic wheels—just a plastic wheel with a rod through it, no bearings. That really reduces the ease of movement. Others come with wheels that include ball bearings, which makes a big difference. That’s something to pay attention to when choosing a floor lift.
Also, look for a lift that’s as lightweight and foldable as possible. Floor lifts come in different sizes, and one key spec to look at is how high the arm can lift. For an adult who’s 180 cm tall, you want an arm that lifts to at least around 2 m, give or take a few cm. That gives enough clearance to raise the person’s hips off the seat and lower them onto a bed that may be slightly higher than the wheelchair.
Building my own ceiling lift
Since the price of a specialised ceiling lift is far beyond the reach of most disabled people, we have to get creative.
I didn’t let the high price stop me from doing something.
A ceiling lift is not a luxury for me—it’s a necessity. I couldn’t just give up.
I spent a long time researching what’s available on the market that could possibly get the job done.
Eventually, I decided on a DIY solution:
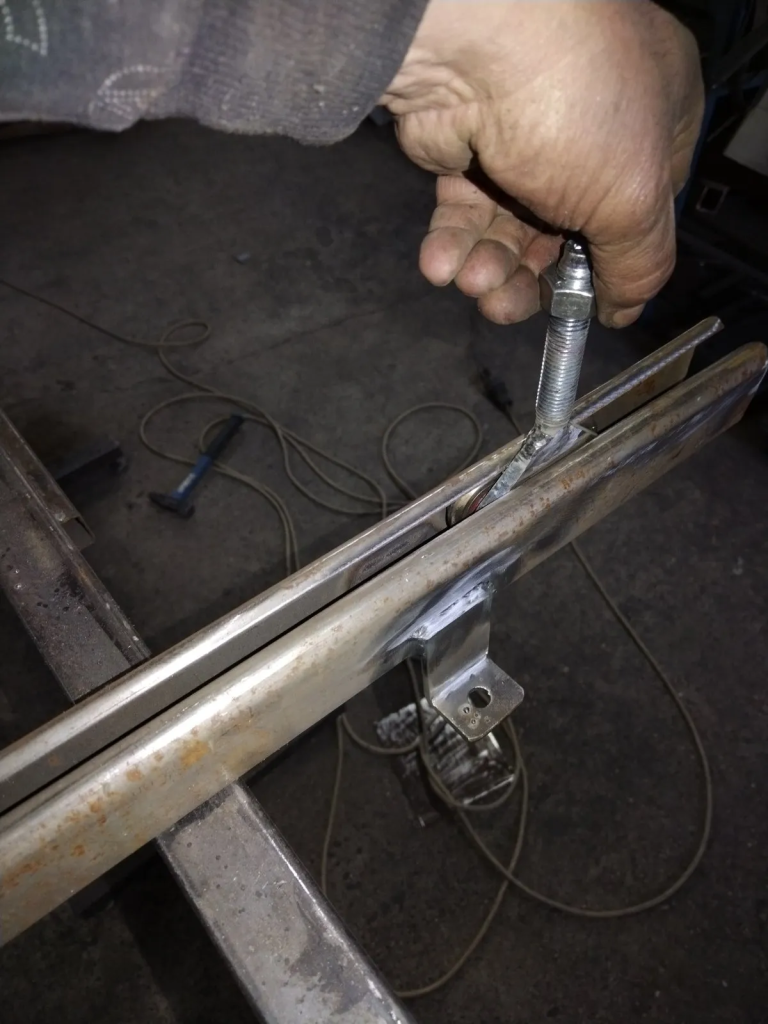
- For the rail, I used a sliding gate track with gate rollers.
- For the lifting motor, I went with the smallest construction hoist I could find—rated for 150 kg. Around here, it’s commonly known as the “sparrow”.
It’s not fancy, but it works—and that’s what matters.
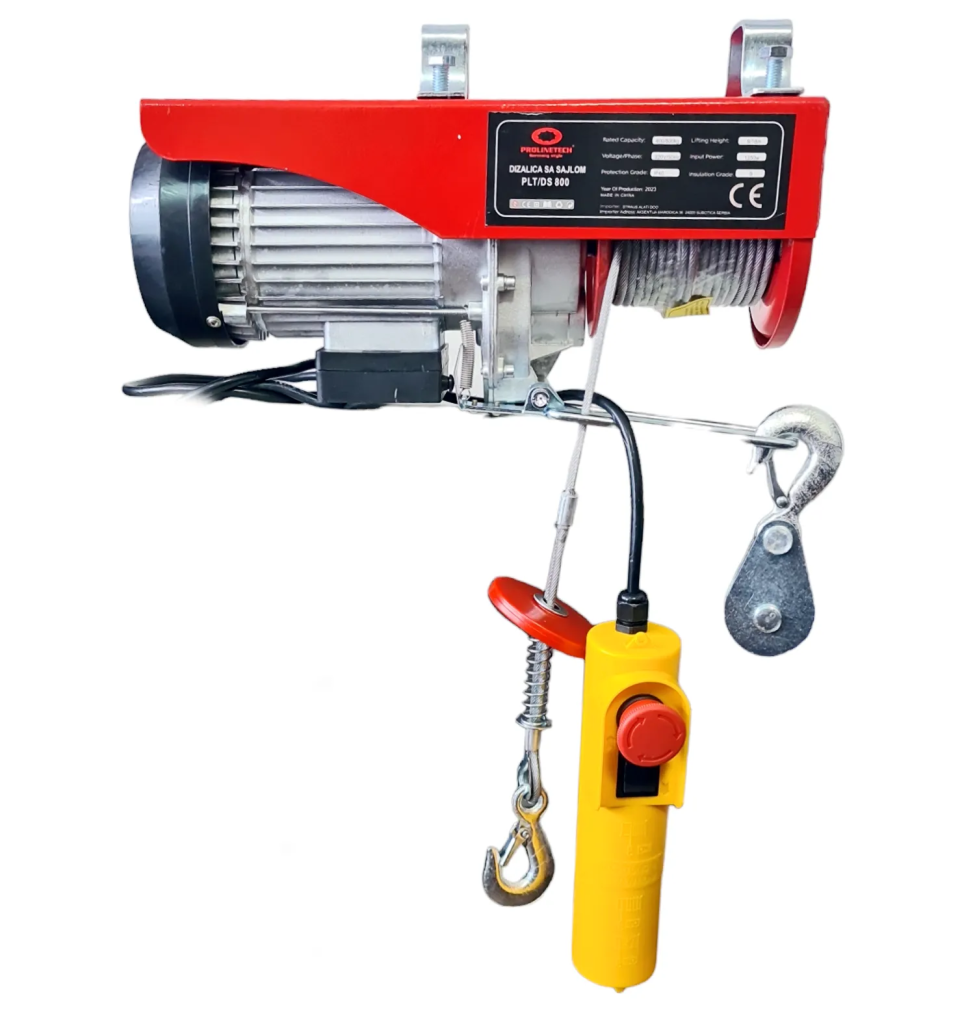
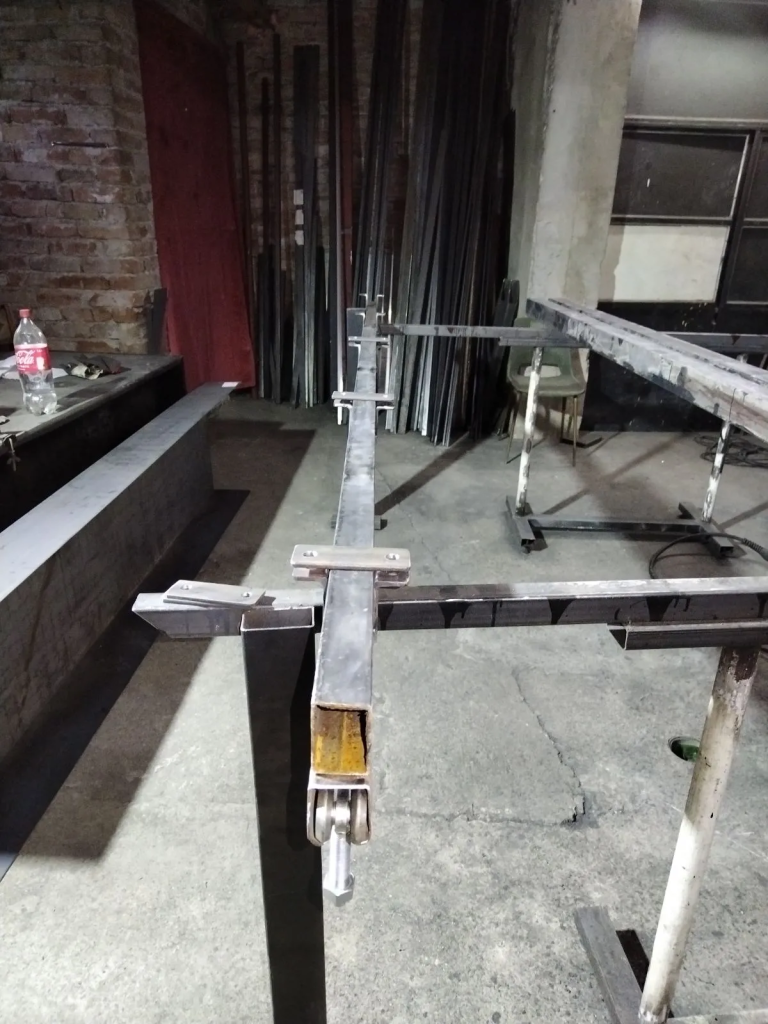
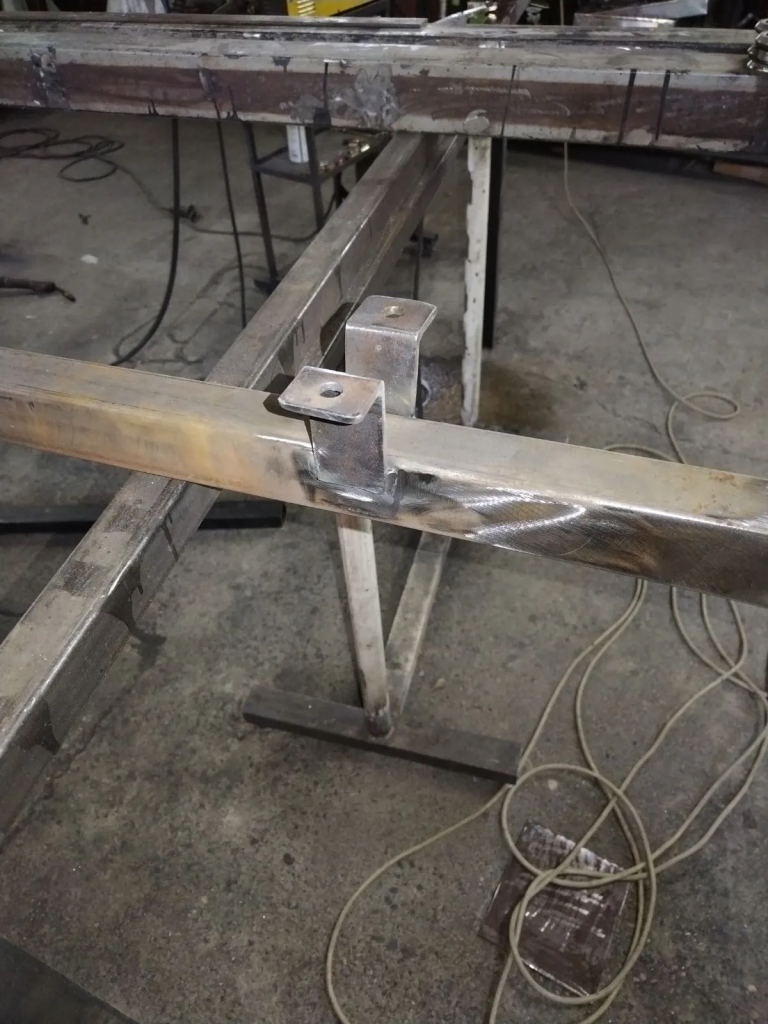
A friend helped me build custom wall brackets and install the ceiling rail based on my own designs, where the “sparrow” hoist will be mounted.
At first, I had the idea to create a sliding mechanism with bearings on all sides of the rail, similar to what’s used in some precision sliding tools.
But it turned out that this approach was too precise and too bulky for what I actually needed.
Design
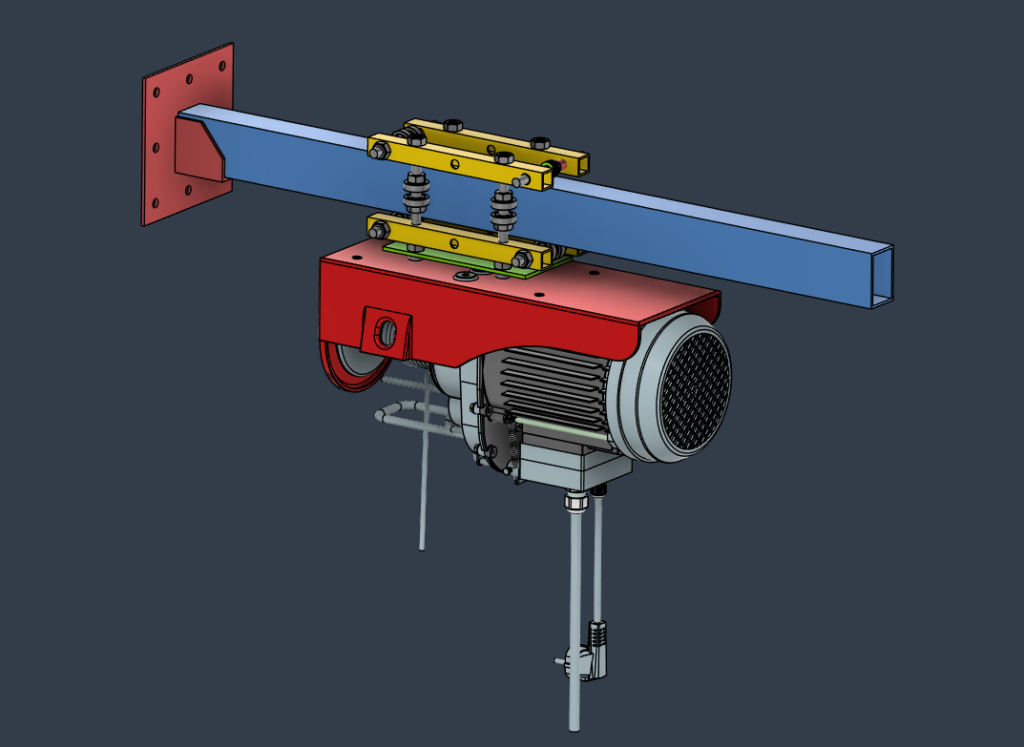
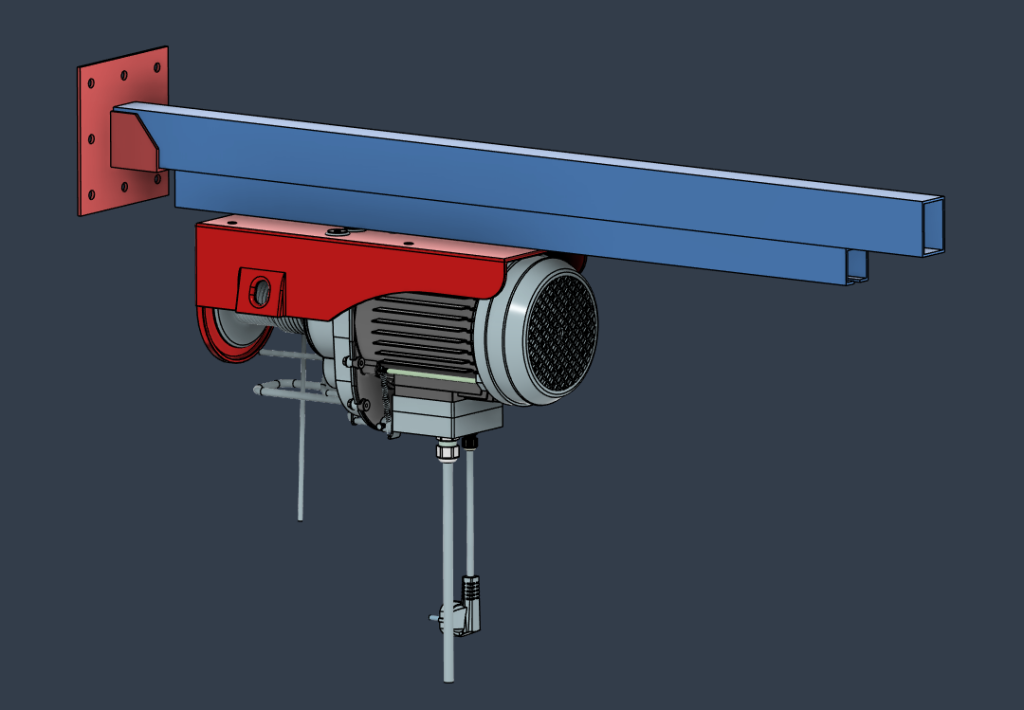
How it turned out in the end:
The upper box profile is 6 x 4 cm, and the lower C-rail is 4 x 4 cm.
We inserted sliding wheels into the C-rail—the same rail and the same type of wheels typically used for sliding gates.
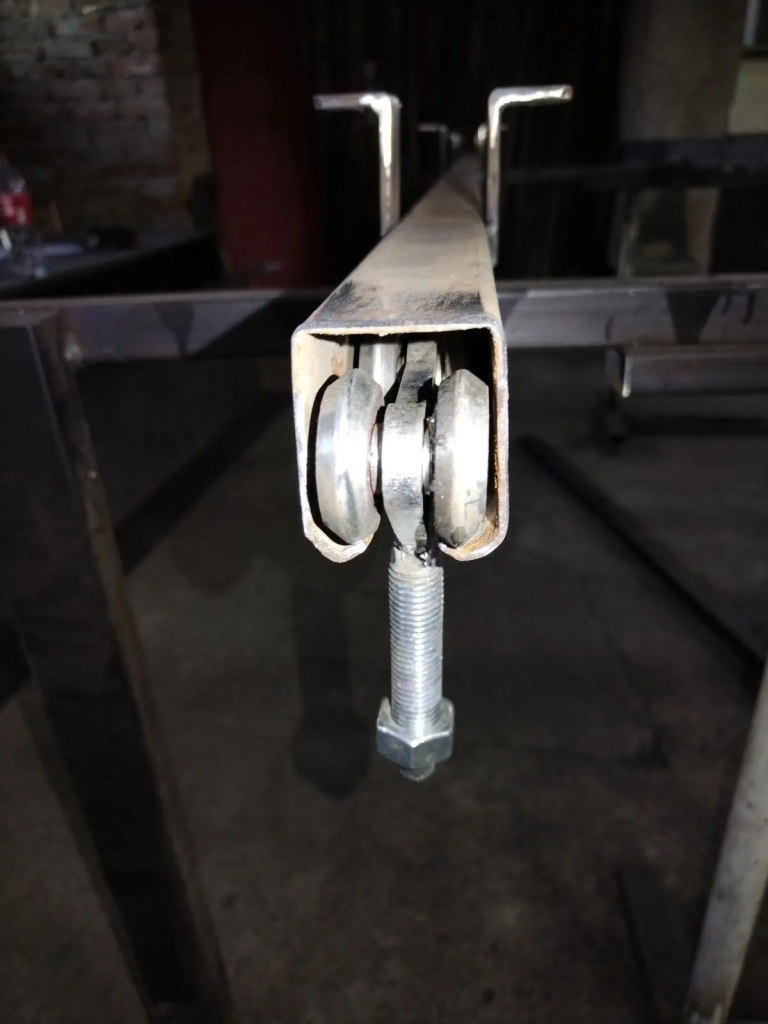
Results: success with caveats
- Works as intended: Smooth lifting/lowering, €250 total cost (vs. €3,000+ commercial systems).
- Space saved: No more hoist crowding my room.
⚠️ Drawbacks:
- The switch clicks loudly every time the up or down button is pressed. It makes a sharp, mechanical noise when lifting or lowering.
- The motor starts abruptly and moves faster than I expected. It doesn’t suit my body — I wish it were at least half as slow. I knew the speed before installing it, but in practice, I still haven’t gotten used to it.
- The “sparrow” (a nickname for this small construction hoist) doesn’t have an emergency stop button or a manual lowering option in case the motor fails or there’s a power outage. And the last thing you want in life is to be left hanging mid-air. Don’t ask me how I know that.
- The vibration from the electric relay transfers through the ceiling rail (since everything is made of metal), making the overall noise even louder — especially late at night when everything else is quiet. These were things I already knew before I started this project. After all, this is a construction hoist meant for harsh environments, and it clearly states it’s not designed for lifting people.
On the other hand, medical lifting equipment has to meet strict safety standards, especially regarding emergency systems and noise levels. It must operate quietly and safely.
These are just my impressions — I’m someone who generally dislikes noisy devices, so this is a subjective view. For comparison, I don’t even like the sound of vacuum cleaners. - The total cost of this DIY ceiling hoist project was around €250. A professionally built ceiling track lift would easily cost over €2,500 to €3,000. For such a big difference in price, I think it’s worth the effort.
- This project showed me that, with some persistence, knowledge, and support, I can create an assistive device that genuinely makes everyday life easier — without having to spend a fortune on commercial equipment.
- It’s not perfect, but it works. And that’s what matters most.
Additional note:
I also considered using an electric winch like the ones used on off-road vehicles before choosing the sparrow hoist.
Lessons learned
- Trade-offs exist: DIY means prioritizing function over polish.
- Speed matters: this motor move too fast for my body transfers.
- Safety first: medical-grade systems include backups (e.g., manual lowering).
Alternatives considered:
- 12V Jeep winches: Even louder, but could work with soundproofing.
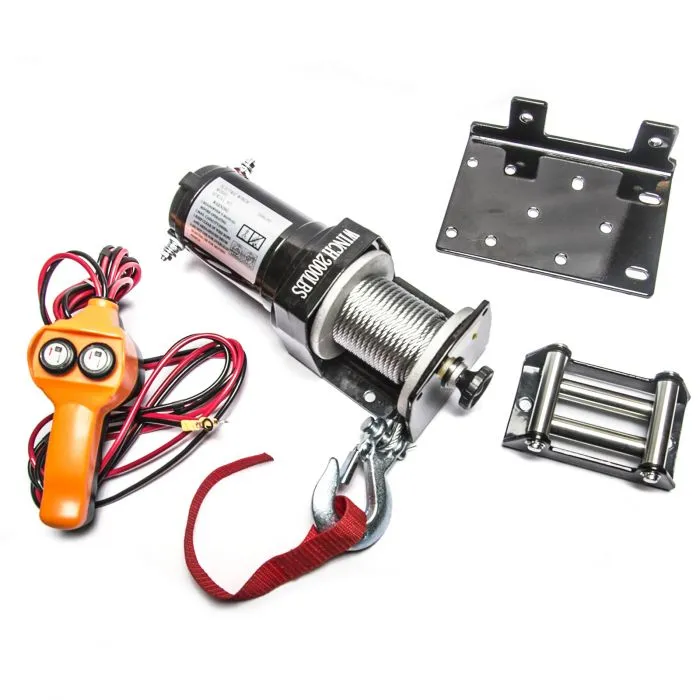
There are some key differences — the sparrow hoist runs on 220V, while a winch typically runs on 12V and is even louder than the sparrow but only half as fast — which would actually suit me perfectly.
Maybe the best solution would be for someone with time and motivation to experiment with a winch setup and try enclosing it in a well-insulated box — using acoustic foam, like the kind used in music studios. I imagine that would significantly reduce the noise.
Of course, if anyone out there has worked on a similar DIY project, I’d love to exchange experiences. Contact me
P.S. If anyone’s soundproofed a winch, I’d love to compare notes!

Be First to Comment